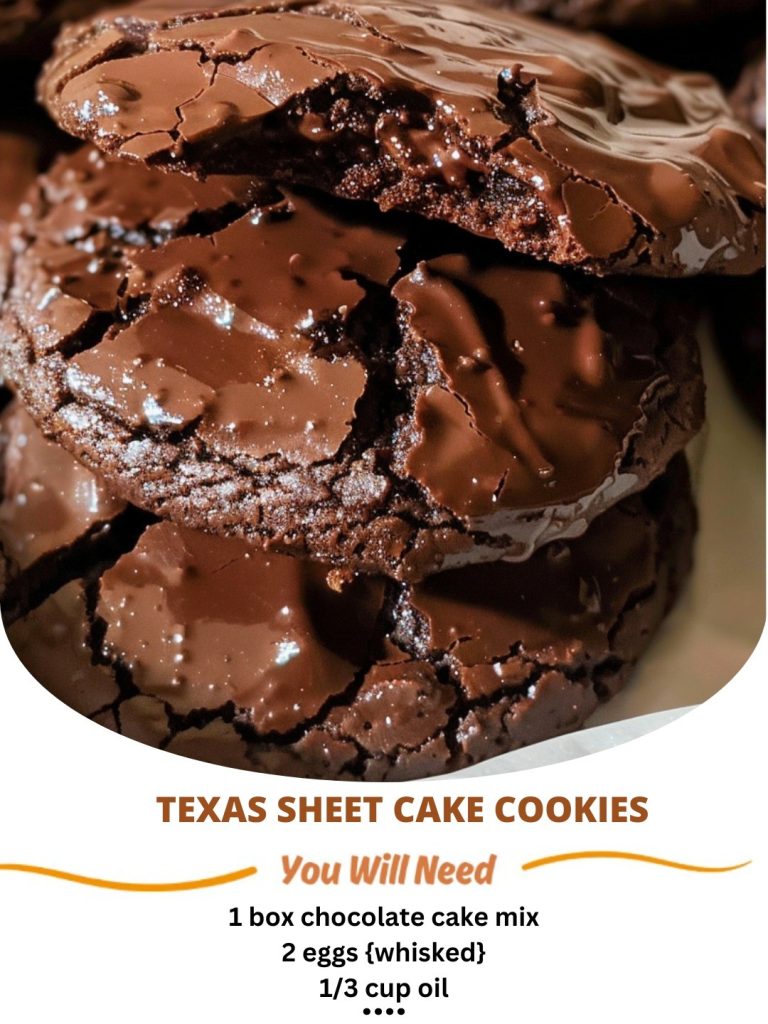
Imagine a giant, decadent cookie that’s as big as the Lone Star State itself, packed with chocolate chips, nuts, and all the goodness you could dream of. That’s the magic of Texas Sheet Cookies. This recipe is a true crowd-pleaser, perfect for potlucks, parties, or any occasion that calls for a sweet treat that feeds a crowd. Let me take you on a journey through the history, flavors, and techniques that make this dessert a star in the world of sheet cookies.
The Origin of Texas Sheet Cookies
While the exact origin of Texas Sheet Cookies is a bit of a mystery, it’s clear that everything is bigger in Texas—including the flavors and portions of these cookies. Some say the recipe originated in the Lone Star State, where everything is done on a grand scale. Others believe it was a creation born out of the need to feed large gatherings with a delicious and easy-to-make dessert. Regardless of its origins, one thing is for sure: Texas Sheet Cookies have become a favorite across the country for their simplicity and irresistible taste.
Flavors and Ingredients
Texas Sheet Cookies are a delightful blend of rich flavors and textures. The base is a buttery, chewy cookie dough studded with an abundance of chocolate chips, toasted nuts, and sometimes a hint of cinnamon for warmth. The combination of sweet and slightly salty flavors creates a harmonious balance that keeps you coming back for more. The toasted nuts add a depth of flavor and crunch that takes these cookies to the next level. The beauty of this recipe lies in its versatility—you can customize it with your favorite mix-ins like dried fruit, coconut flakes, or even a swirl of caramel.
Cooking Techniques
The key to achieving the perfect Texas Sheet Cookie lies in the baking technique. The dough is spread out on a large baking sheet, creating a thin layer that bakes up into a chewy, gooey masterpiece. Make sure to evenly distribute the dough to ensure each bite is filled with all the delicious mix-ins. Keep a close eye on the baking time to prevent over-baking; you want the edges to be golden brown while the center remains soft and chewy. Once out of the oven, allow the cookie to cool slightly before cutting into squares. This allows the flavors to meld together and the cookie to set properly for easy serving.
Frequently Asked Questions
Q: Can I make Texas Sheet Cookies ahead of time?
A: Absolutely! These cookies actually taste even better the next day as the flavors have had time to meld together. Store them in an airtight container at room temperature for up to 3 days, or freeze for longer storage. Just be sure to let them come to room temperature before serving for the best texture.
Conclusion
In conclusion, Texas Sheet Cookies are a delightful indulgence that brings together all the best flavors and textures in one giant cookie. Whether you’re baking them for a special occasion or just to satisfy a sweet craving, these cookies are sure to impress. So, grab your baking sheet and get ready to whip up a batch of these Texas-sized treats. Don’t forget to share your experience and variations in the comments below—let’s keep the baking magic alive!

Texas Sheet Cookies
Description
Deliciously comforting cookies with a buttery, vanilla flavor and a hint of chocolate in every bite. Ideal for parties, potlucks, or a cozy night in.
Ingredients
Cookie Base
Toppings
Instructions
Preparing the Cookie Dough
-
Mixing the Ingredients
In a large bowl, cream together butter, sugar, and brown sugar until light and fluffy. Add in eggs and vanilla extract, beating well.Ensure the butter is at room temperature for easier mixing. -
Incorporating Dry Ingredients
Gradually add flour, baking soda, and salt to the wet mixture. Mix until a smooth dough forms.Do not overmix the dough to avoid a tough texture.
Assembling and Baking
-
Preparing the Sheet Pan
Spread the cookie dough evenly onto a greased sheet pan, pressing it down to form an even layer.Make sure the sheet pan is properly greased to prevent sticking. -
Baking the Cookies
Bake in a preheated oven at 350°F (175°C) for 20-25 minutes or until the edges are golden brown.Keep an eye on the cookies towards the end of baking to prevent over-browning.
Finishing Touches
-
Cooling and Cutting
Allow the cookies to cool completely in the pan before cutting them into squares or rectangles.For cleaner cuts, you can chill the cookies in the fridge before slicing. -
Optional Glaze or Frosting
Drizzle with a simple glaze or frost with your favorite icing once the cookies are cooled if desired.Sprinkle with colorful sprinkles or chopped nuts for extra flair.
Note
- For a chewier texture, slightly underbake the cookies and allow them to cool completely in the pan.
- Feel free to add chopped nuts, dried fruits, or chocolate chips to customize the cookies to your liking.
- Store the cooled cookies in an airtight container at room temperature for up to 5 days or freeze for longer storage.
- You can double the recipe and bake in a larger sheet pan for a bigger batch. Adjust baking time accordingly.


